Embroidery machines are amazing. These days transferring embroidery files to your machine is a piece of cake, as most newer machines read files over a USB. Digitizing software, to design your own files, can be expensive though! This tutorial is to show you how to design your own, using software you can try for free! If you decide you love it, and want to purchase it, you can purchase your own license for $75. I’m not affiliated with the S&S Computing, the company that created SewArt, but I’ve been using and teaching it for 3+years, and am happy to share the joy of embroidery! So let’s get started!
Step 1: Download the free 30 day trial. You can use it on Windows or Mac!
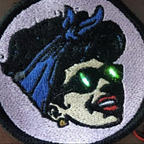
Step 2: Decide on an image to stitch! SewArt reads all image file types. Images with many gradients of color are going to be difficult. I recommend finding a simple image to begin learning SewArt. Try googling the thing you want to stitch, including the words ‘vector’ or ‘clipart’. The search should give you a nice variety to choose from. Here are some examples:

Black and white images are the easiest, as you can always add colors later in the SewArt program. Keep in mind however to keep it simple, images with a lot of lines, like the cacti in top right, will not stitch very cleanly. Stay away from ultra thin lines too, it’s easy to lose thin details in SewArt. Another thing to consider when choosing your image is the size. It’s tricky to turn a 1"x 1" image into a nice looking 4"x 4" patch. We will eventually be assigning stitches to the pixels, or blocks of colors!

Step 3: Open your image in the SewArt program. You can either click the folder icon or go to ‘file’ and select ‘open’ from the drop down list.

Step 4: Crop (if needed) & resize your image! Depending on what embroidery machine you’re using, you will be limited to how large an area you can embroider. Small machines can only stitch 4"x 4"! The closer you crop any extra white space out, the more accurate your stitch file will be in size.

Step 5: Simplify your colors! There are multiple ways to simplify your colors, if you have a black and white image, you have it easy:

You’ll notice when you click on the image color reduction icon, a box will open asking you to enter the number of colors in the image. To our eyes, this cacti is 2 colors, black and white, the software however “sees” 64 different shades of black and white! If you zoom in on it, you can see them too! This is an easy fix because all you have to do is enter “2” into the image color reduction box, don’t forget to press “ok”.

Now that the image is simplified, you can use the paint bucket tool to add more colors. Now the cacti is 4 colors; beige, green, black, and white!
If your image is not black and white, maybe it appears to have 3 or 4 colors, the image color reduction tool isn’t as reliable for simplifying. We’ll need to posterize our image. Posterizing condenses our colors. When I first brought it in, the image was 163 different colors, after posterizing, it was 26!

26 colors is still too many though, as this cacti will only be stitched with 4. After posterizing, we’ll click on the merge colors icon, to turn these 26 colors into 4!

The blocks of color on the right, represent the spools of thread you’ll be using. In this step, I find it helpful to have my thread picked out and ready to stitch nearby. A nice feature about merging colors, is that you can click on a box of color, and it will show you where it is in the image:

When I clicked on a black box, it shows me some outlines of the cacti. The program sees different shades of black, green, brown, and even states the percentage of the area it uses. Let’s select the “merge range” box to quickly condense the colors.

After selecting merge range, depending on our image, we’ll still have to manually merge the remaining colors. I’m going to click on the remaining black boxes, and click on merge, until I only have 1 black box left. Same goes for my orange and green. Don’t merge your white though, negative space is your friend!

Get rid of thin lines by clicking “despeckle” instead of merge. This will give you nice clean lines to assign stitches to.

Now that your image is simplified and clean blocks of color, we’re ready to assign stitches to them!

Step 6: Click on the sewing machine icon. There are two ways to assign stitches. Clicking on “auto sew-sew all colors” will stitch all your colors at once, including the background. I prefer to manually click and assign stiches to my blocks of color. Your mouse pointer turns into a sewing needle when you’re in this last stage. The tiny blue box where you click on a section of color, represents where the needle will begin sewing:

You can change your angle and density of the stitch before clicking/stitching a section or by changing the angle. I like to change the angle of my stitches sometimes for a nice contrast. Another nice feature is to add a texture, but keep in mind textures can take longer for the machine to embroider, versus a regular fill stitch:


Once you’re ready to save your stitches, determine what kind of file your machine reads. Brother models for example read PES files. Janomes read JEFs. SewArt saves a TIF and SAF file first, essentially your digitized image, but the most important screen is this one:

At this save point you can select your file type, make sure your file is the correct size, whether or not to have the machine cut the thread in between blocks of color, and if you’re very particular, what brand of thread you’re using. After saving the file you should be able to transfer it to the machine! If your machine only stitches 4"x 4" designs, like mine and you put a 5" x 5" file on it, the machine will refuse to see it, so keep that in mind if that happens to you!
Please let me know if you have any questions or if you found this tutorial helpful, happy stitching!