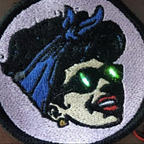
Step up your sewing skills by making something neat and functional! This project should only take an hour or sew to complete if your fabric is already embroidered. If you want to learn how I made my embroidered design, please see my article on how to create an awesome embroidery file.

First, assemble your supplies! When choosing my fabric to embroider and sew with I avoid using stretchy materials. The embroidery machine and stretchy fabric are not great friends, inevitably you will be cutting them apart as they like to start fights with one another. Choose cotton or something sturdier like canvas or felt. If your cotton is thin, you will definitely need to use stabilizer underneath while embroidering. I favor 8" zippers for my pouches, but you can use larger or smaller depending on what your bag will hold. I designed my zipper pouch to have a solid colored fabric on the outside, and a neat print on the inside. You don’t want your embroidery to get lost in your print, so I recommend a solid for at least the embroidered side. The bag is made of 4 separate rectangles, so if you want to go crazy and use 4 different pieces of fabric, go for it!

Your zipper size will determine the width of your pouch, the length is up to you to decide! I cut out a neon paper template so that I could replicate my pattern in the future. My width on my template is 10", even though my zipper is 8", this is to give me plenty of extra fabric for my seam allowance. Occasionally I will turn the extra material into a strap, after I’ve trimmed it off. If you are going to embroider your fabric, make sure the rectangle you cut can still fit into your embroidery hoop!
Loading your embroidery hoop can be tricky, use a table, it will be easier with a flat surface to press down onto. Start with the bulky, bottom hoop that has hardware on it. Then place your stabilizer textured side up over the bottom hoop. Next, place your fabric, taking care to make sure both the stabilizer and fabric are still evenly centered on your hoop. Finally the little thin hoop gets pressed on top. My favorite method is to use my thumb and pointer finger to hold in the top of hoop, then I use my other hand’s thumb and finger to press the bottom corners of the hoop in. There should be no wrinkles on your embroidery area. If you do get a little wrinkle, before taking it apart and trying again, press down on the hoop sides and gently pull out the excess fabric on the sides. Usually you can pull the wrinkle out if it’s not a big one. Your fabric should be taut like a drum and secure, as the needle will be stabbing it repeatedly! You can tighten the screw on your hoop, but be careful to never over tighten, many a hoop hath perished due to overzealous tightening on the hoop’s screw.


Once your fabric is ready to embroider, snap it into your machine and get stitchin! Don’t forget to thread your top and bottom thread properly. It sucks to step away from an embroidery machine and come back to it with a large thread booger built up on the fabric instead of your gorgeous design! Once the embroidery machine is humming along you can plug in an iron and start on the next steps.

Your fabric has rough scraggly edges that are beginning to fray, these simply won’t work against the teeth of a metal zipper! Decide on which edges will be sewn onto the zipper, then fold those sides down about a 1/4 to 1/2" straight as you can. Use a hot iron set to your specific fabric settings to press the fold down.

When your embroidery is finished stitching, take your embroidery hoop off of the machine, pop it out of the hoop, tear away the stabilizer, and cut away any stray threads. Iron the top edge just like you did for the other 3 rectangles.


The first fabric squares we will attach to the zipper are the inside pieces. They will be sewn onto the BACK of the zipper. Use three pins to fix it to the zipper, leaving a tiny space between the fabric and metal teeth, just like in photo below!

Time to start sewing! If you’re using a Brother Sewing & Embroidery machine like I am, you will have to switch it over from embroidery to sewing, this involves attaching different arms, feet, etc. Begin sewing to the left of your closed zipper. Your feed dogs are the metal teeth beneath your sewing foot. They are not going to like the metal bits at the beginning and end of your zipper. To avoid getting caught on them, very lightly ease your presser foot over them, while still sewing. If you aren’t confident in sewing and lifting levers at the same time, you can always just lay down a few stitches and shift your zipper/fabric back a teeny bit to get past those metal bits.

Sew the zipper part of the way, taking out the pins as you go. Once partially sewn, stop, lift your needle and presser foot up, and unzip your zipper. This is to get the zipper head out of the way so you can finish attaching the the fabric to the zipper!


Attach the other inside piece to the back of the zipper!

After attaching the inside pieces, flip it over. Hopefully yours will look like mine shown above. Snip any stray threads that might jam up the zipper later. Then you can pin on the top fabric pieces to the top side of zipper.


Once all four fabric rectangles are attached, you are ready to to do some sewing magic! To get this trick right, you must make sure your outside pieces are facing one another, and your inside faces must be facing each other too. Just like in photo below!

Make sure your zipper is partially unzipped, this will save you some trouble later on! Then push some pins into place on three sides of your rectangle. Leave the inside pieces open and unpinned. Pinch the zipper through the fabric. Wherever you feel the metal bits at the beginning and end of your zipper is where your pins should line up.


When you are sewing over your pinned area and reach the metal bits at the beginning & end of the zipper, manually sew with your fly wheel nice and slow. If you don’t slow down over these metal parts it is very likely your will break your sewing needle. Once you have sewn the pinned areas, cut off the extra material like shown below.

Now it’s time for the magic trick! Stick your hand into the bottom of the zippered pouch, in my case, the printed fabric. Because my zipper is partially unzipped, I am able to stick my hand in through the bag to grab the outside pieces and pull the entire thing inside out! Use your fingers or some other rounded object to push out the corners. You’re almost done!

Pick up the inside fabric pieces and fold the frayed edge in. Use a hot iron to press down the folded edges. Pin the flat edges down until you’re ready to sew it closed!


Once the bottom edge is sewn, tuck the lining, the inside piece, into your pouch. Congratulations! Your zipper pouch is complete! Happy sewing!